Caulking painting embarks on an inspiring journey, guiding readers through the intricate art of surface enhancement with meticulous detail and innovative flair.
Prepare to delve into the intricacies of caulking and painting, unlocking the secrets to flawless finishes and enduring aesthetics.
Types of Caulking and Paint
Choosing the right type of caulk and paint for your project is essential to ensure a long-lasting, professional-looking finish. Here’s a breakdown of the different types available and their specific uses:
Types of Caulking, Caulking painting
- Silicone Caulk:A versatile and durable option suitable for most applications, including kitchens, bathrooms, and windows. It’s waterproof, flexible, and resistant to mold and mildew.
- Acrylic Caulk:A water-based caulk that’s easy to apply and paint over. It’s ideal for smaller gaps and cracks, but not as durable as silicone.
- Polyurethane Caulk:A strong and flexible caulk that’s resistant to chemicals and UV rays. It’s often used for exterior applications, such as sealing around windows and doors.
- Butyl Caulk:A rubber-based caulk that’s highly adhesive and waterproof. It’s commonly used for sealing around pipes and vents.
Types of Paint for Caulking Applications
When choosing paint for caulking applications, consider the following factors: durability, finish, and compatibility with the caulk. Some common options include:
- Acrylic Paint:A water-based paint that’s easy to apply and clean up. It’s available in a wide range of colors and finishes, including flat, eggshell, and semi-gloss.
- Latex Paint:Another water-based paint that’s durable and resistant to fading. It’s available in a variety of finishes, including matte, satin, and gloss.
- Oil-Based Paint:A more durable option that’s resistant to moisture and wear. It’s often used for exterior applications or areas with high traffic.
Preparation for Caulking and Painting

Before you start caulking or painting, it’s crucial to prepare the surfaces properly. This ensures a strong bond between the caulk or paint and the surface, leading to a durable and aesthetically pleasing finish.
Proper surface preparation involves three key steps: cleaning, sanding, and masking. Each step plays a vital role in ensuring the success of your caulking and painting project.
Cleaning
Begin by thoroughly cleaning the surfaces to remove any dirt, dust, grease, or other contaminants. Use a mild detergent and a soft cloth or sponge. Rinse the surfaces with clean water and allow them to dry completely before proceeding.
Cleaning is essential for creating a clean and smooth surface for the caulk or paint to adhere to. Contaminants can interfere with the adhesion, leading to premature failure.
Sanding
Once the surfaces are clean, sand them lightly using fine-grit sandpaper. Sanding creates a slightly rough surface, providing a better grip for the caulk or paint.
Sanding is particularly important for glossy surfaces, as it helps to remove the shine and create a more receptive surface for the caulk or paint.
Masking
Finally, use masking tape to protect areas you don’t want to caulk or paint. This includes adjacent surfaces, fixtures, and trim. Press the tape firmly into place to prevent any seepage.
Masking ensures clean and precise application of caulk or paint, preventing any unwanted spills or drips. It also saves you time and effort in cleaning up later.
Caulking Techniques

Mastering caulking techniques is crucial for a successful painting project. This guide will provide step-by-step instructions on applying caulk, choosing the right tools, and exploring common caulking methods.
Caulking is an essential step in preparing surfaces for painting, as it seals gaps and prevents moisture penetration. By following the techniques Artikeld here, you can achieve a professional-looking finish that will protect your surfaces for years to come.
Choosing the Right Tools
- Caulk gun: A tool used to dispense caulk evenly and precisely.
- Caulk nozzle: A tip attached to the caulk gun that determines the bead size and shape.
- Putty knife or caulking tool: A tool used to smooth and shape the caulk.
- Rubbing alcohol or denatured alcohol: For cleaning surfaces and removing excess caulk.
- Damp cloth or sponge: For wiping away excess caulk and smoothing surfaces.
Step-by-Step Caulking Instructions
- Clean the surface: Remove dirt, dust, and moisture from the surface to ensure proper adhesion.
- Choose the right caulk: Select a caulk type suitable for the material and application (e.g., latex, silicone, polyurethane).
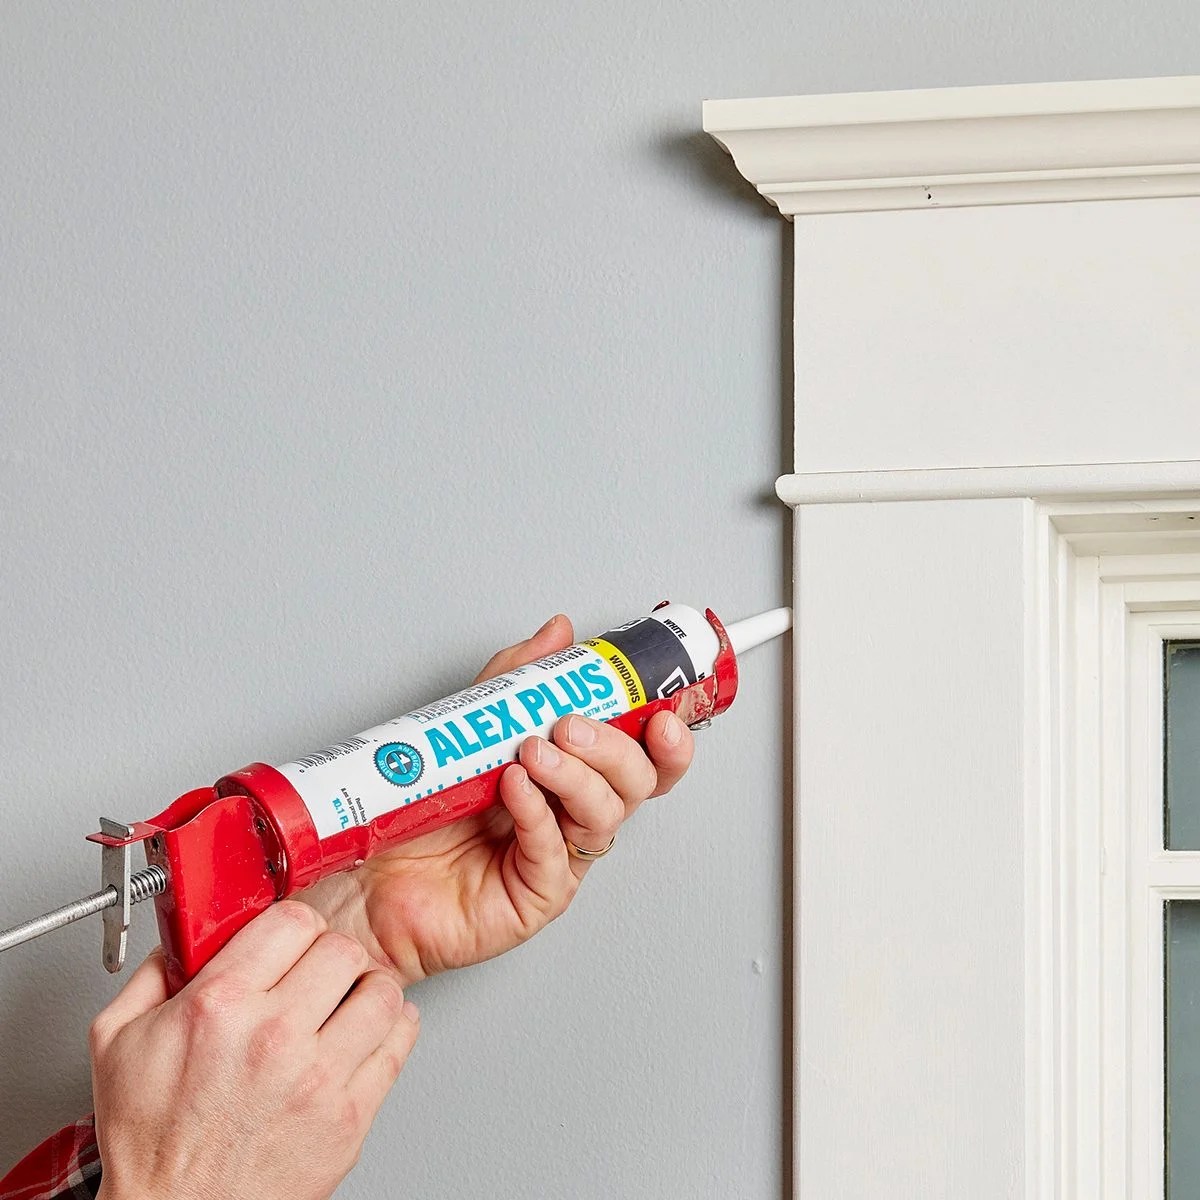
- Cut the nozzle: Cut the nozzle at a 45-degree angle to create the desired bead size.
- Load the caulk gun: Insert the caulk tube into the gun and cut the tip of the tube.
- Apply the caulk: Hold the gun at a 45-degree angle and apply the caulk in a continuous, even bead.
- Smooth the caulk: Use a putty knife or caulking tool to smooth and shape the caulk, ensuring it fills the gap completely.
- Remove excess caulk: Wipe away any excess caulk with a damp cloth or sponge.
- Beading: Applying a thin, continuous bead of caulk to seal gaps.
- Tooling: Using a putty knife or caulking tool to shape and smooth the caulk, creating a professional-looking finish.
- Backer rod use: Inserting a backer rod into gaps before applying caulk to provide support and prevent excessive caulk usage.
- Cracks in caulk or paint can occur due to movement or settling of the underlying surface.
- To repair cracks, remove loose or damaged caulk or paint using a utility knife or scraper.
- Clean the surface and apply a fresh layer of caulk or paint, ensuring proper adhesion.
- Peeling paint is often caused by moisture penetration or improper surface preparation.
- To address peeling, remove the loose paint using a scraper or sander.
- Ensure the surface is dry and clean before repainting, and apply a primer to enhance paint adhesion.
- Fading of paint can occur due to prolonged exposure to sunlight or harsh weather conditions.
- To prevent fading, choose paint with high UV resistance and consider applying a protective topcoat.
- Regular cleaning and maintenance can also help preserve the color and finish of painted surfaces.
Common Caulking Methods
Painting Techniques
Painting over caulked areas requires careful attention to detail to achieve a smooth, even finish. The choice of painting technique depends on the size of the area, the type of paint being used, and the desired finish.
For small areas, a brush can be used to apply paint over the caulk. Use a small, soft-bristled brush and apply the paint in thin, even strokes. Avoid overworking the paint, as this can cause it to smudge or build up.
Rolling
For larger areas, a roller can be used to apply paint over the caulk. Use a foam roller with a nap size that is appropriate for the surface being painted. Apply the paint in long, even strokes, overlapping each stroke by about half.
Avoid rolling over the caulk too many times, as this can cause it to become compressed and less effective.
Spraying
For a more even finish, a sprayer can be used to apply paint over the caulk. Use a spray gun with a fine nozzle and adjust the pressure to achieve a smooth, even spray. Hold the spray gun perpendicular to the surface being painted and move it back and forth in a steady motion.
Avoid spraying too much paint in one area, as this can cause it to run or sag.
Regardless of the painting technique used, it is important to allow the paint to dry completely before applying a second coat. This will help to ensure a smooth, even finish and prevent the paint from peeling or chipping.
Maintenance and Repair
Regular maintenance and repair are crucial for preserving the integrity and aesthetics of caulked and painted surfaces. By addressing potential issues promptly, you can prevent costly repairs and maintain the desired appearance of your home or property.
Inspect surfaces periodically for signs of damage or deterioration. Common problems to watch for include cracking, peeling, or fading. These issues can be caused by various factors such as weather conditions, exposure to UV rays, or improper application.
Cracking
Peeling
Fading
Final Wrap-Up
As we conclude our exploration of caulking painting, let us embrace the transformative power of these techniques, empowering us to create surfaces that exude both beauty and resilience.
Questions and Answers: Caulking Painting
What are the different types of caulking available?
Caulking comes in various types, including silicone, acrylic latex, polyurethane, and butyl rubber, each with unique properties suited for specific applications.
How do I prepare a surface for caulking and painting?
Thoroughly clean the surface, sand it to create a smooth base, and mask off areas that should not be painted or caulked.
What are some common caulking techniques?
Beading, tooling, and backer rod use are common caulking methods, each with its own advantages and applications.
How do I paint over caulked areas?
Use a brush, roller, or sprayer to apply paint over caulked areas, ensuring smooth, even coverage without buildup or smudging.
Why is maintenance and repair important for caulked and painted surfaces?
Regular maintenance and repair help preserve the integrity and aesthetics of caulked and painted surfaces, preventing premature deterioration.